
Magento Checkout Analytics with Zuko
Set up Zuko tracking on your Magento eCommerce site to understand where you are losing customers.
Zuko Analytics integrates with the Magento eCommerce platform to let you track your potential customers as they move through your checkout. You can then understand any points of friction where they may be abandoning their basket and never coming back.
This guide takes you through how you can set the Zuko tracking up and start harvesting those insights. It is written using the example of Google Tag Manager to install the code but the principle should be the same for other tag managers or if you wanted to hardcode the tracking.
Step 1 - Ensure you have a tag manager installed
You can integrate Google Tag manager into your Magento eCommerce platform directly or through a third-party plug-in. Once you have successfully installed it you are ready to add Zuko code.
Step 2 - Set up your Zuko account
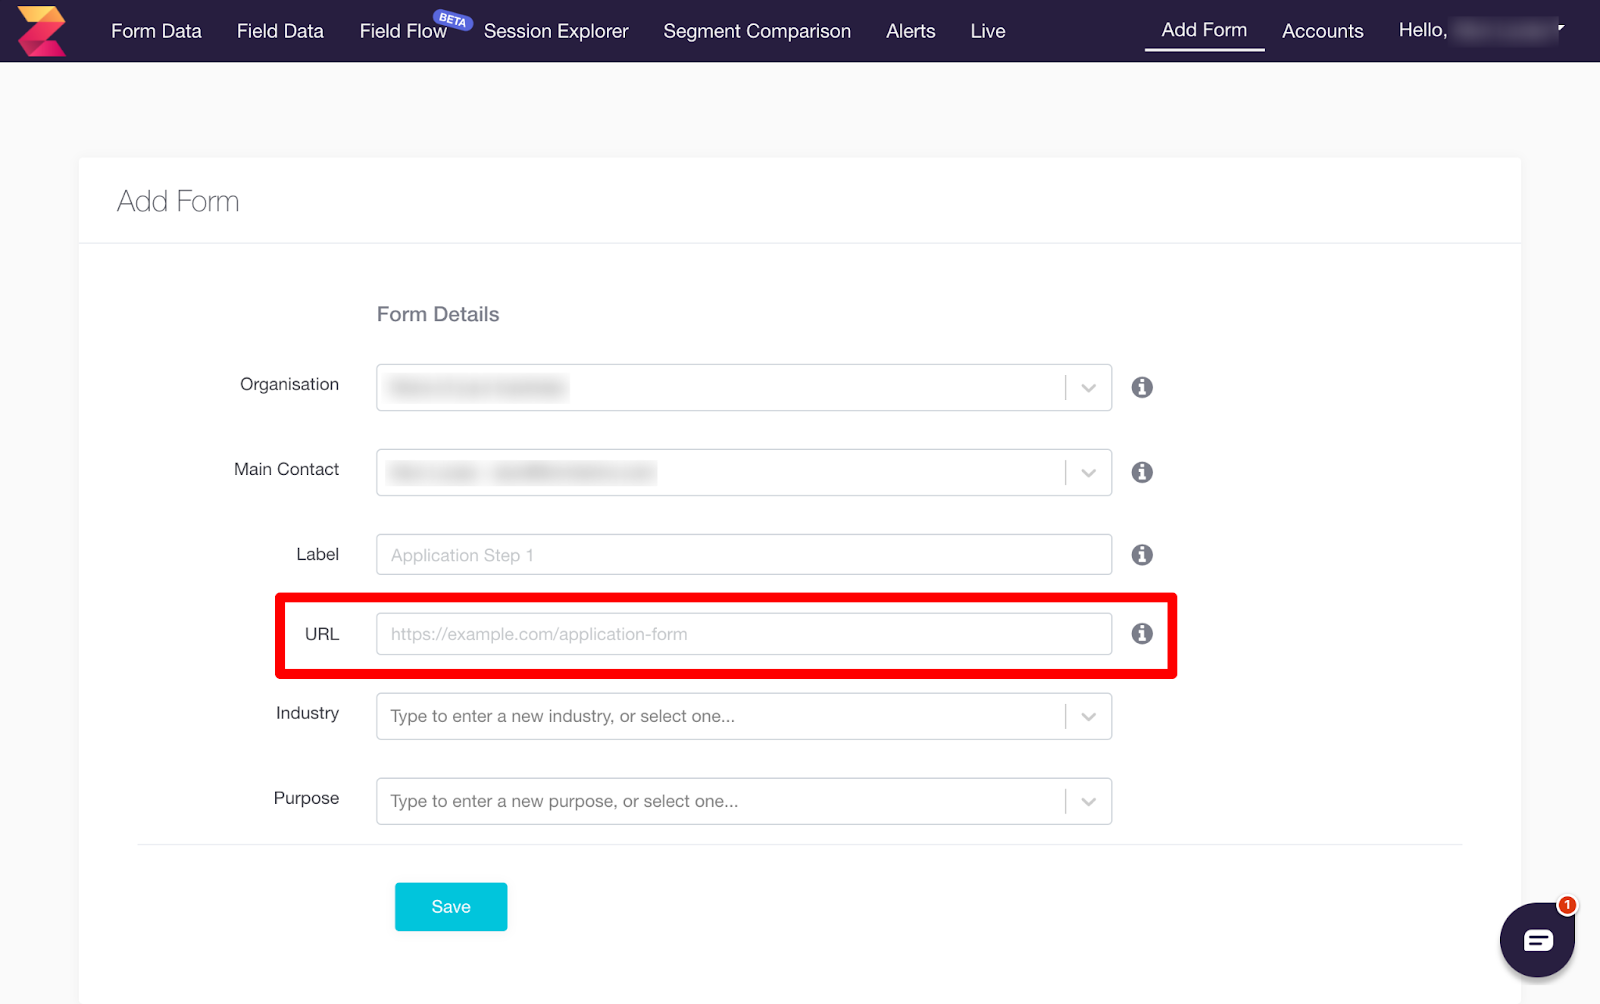
You’ll need to get started with a Zuko free trial or paid subscription. You should then set up a new form using the URL of your Magento checkout:
Step 3 - Get your Zuko code
Once you have set up your form you will be given two pieces of code:
Activity Tracking Tag - this tracks interaction with your checkout, and needs to be fired when a visitor first reaches the page.
Completion Tracking Tag - this tracks successful completions of the checkout and should be fired when you consider that it has been successfully submitted (e.g. a thank you page).
Step 4 - Set up the Activity Tracking Tag
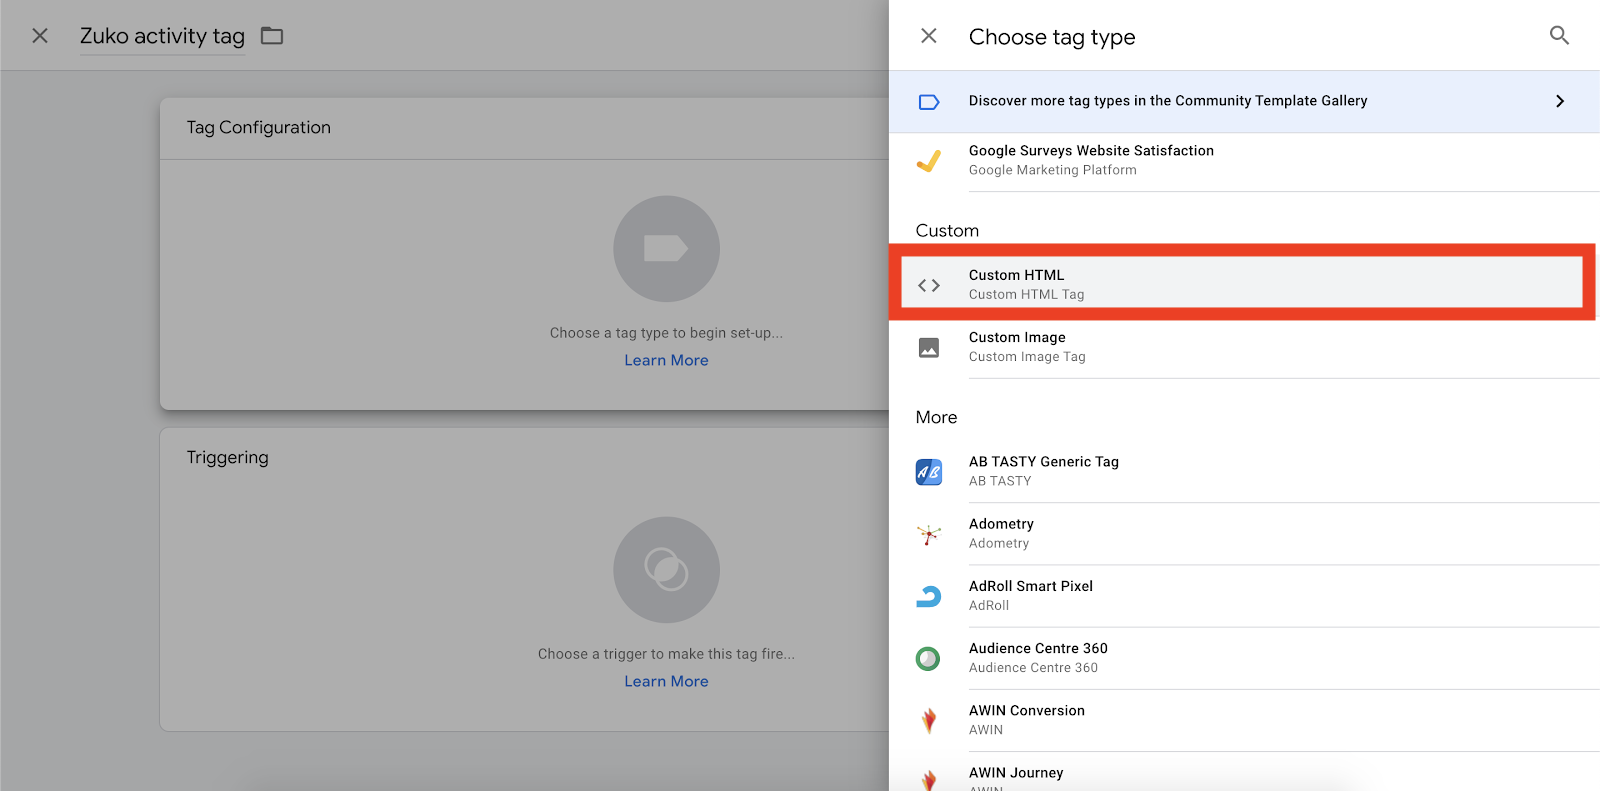
Open Google Tag manager for your eCommerce site and select “New Tag”

Rename the Tag so you will recognise it the Zuko activity tag then open the Tag configuration:

Then select Custom HTML tag from the list of options:
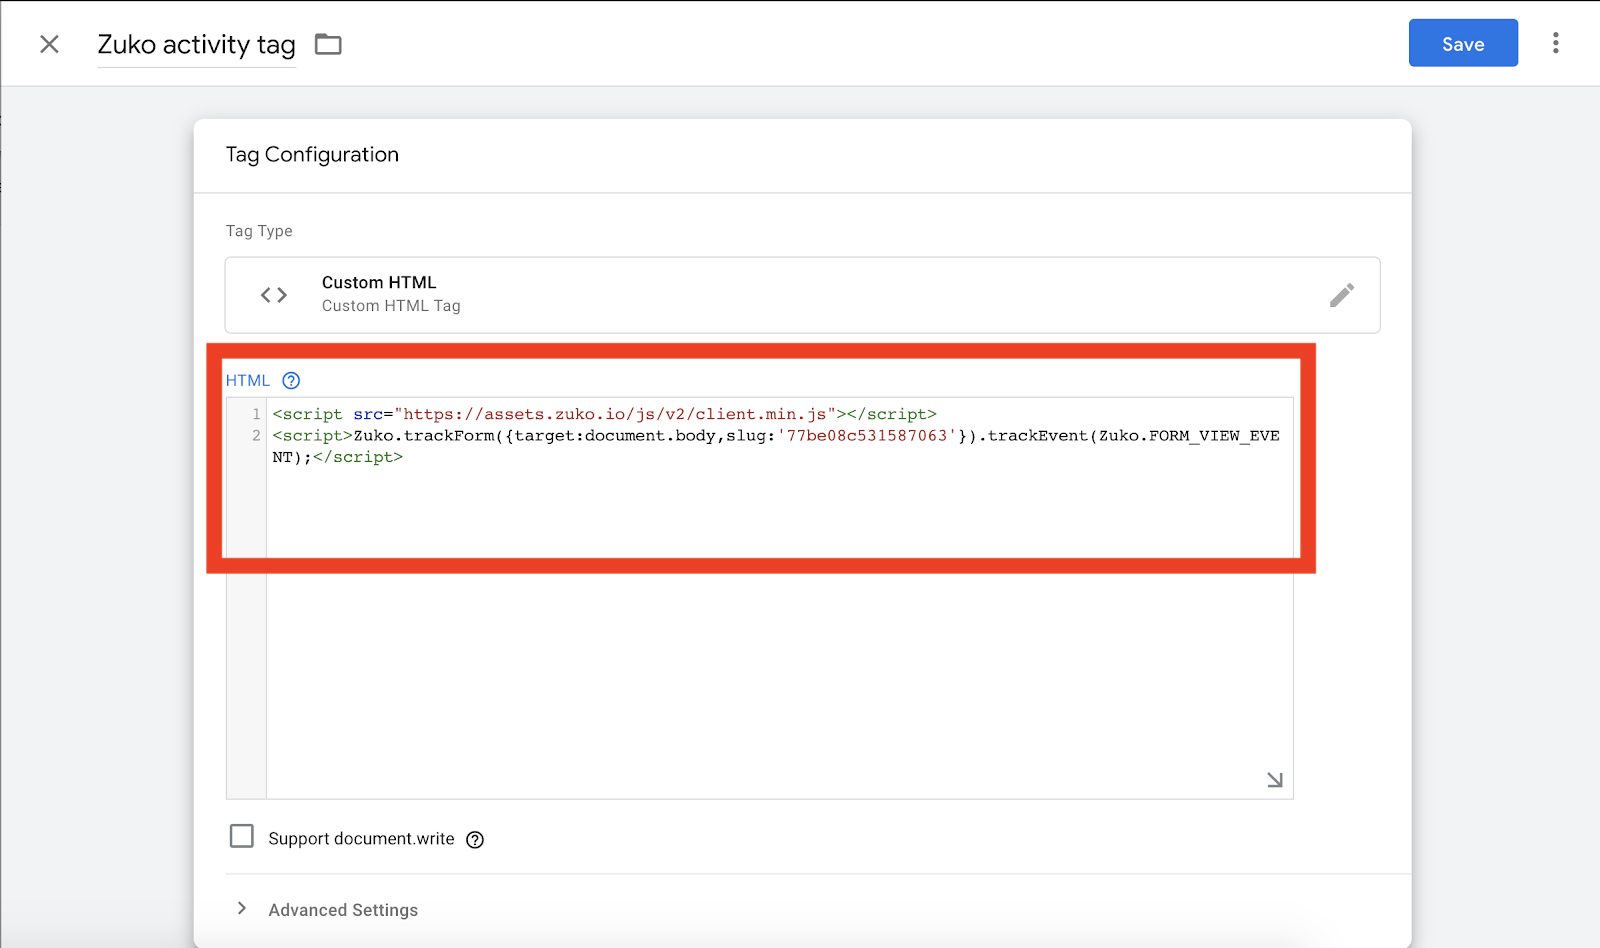
You should then copy the Activity Tracking code for your checkout from within your Zuko account. Paste it into the Custom HTML text area:
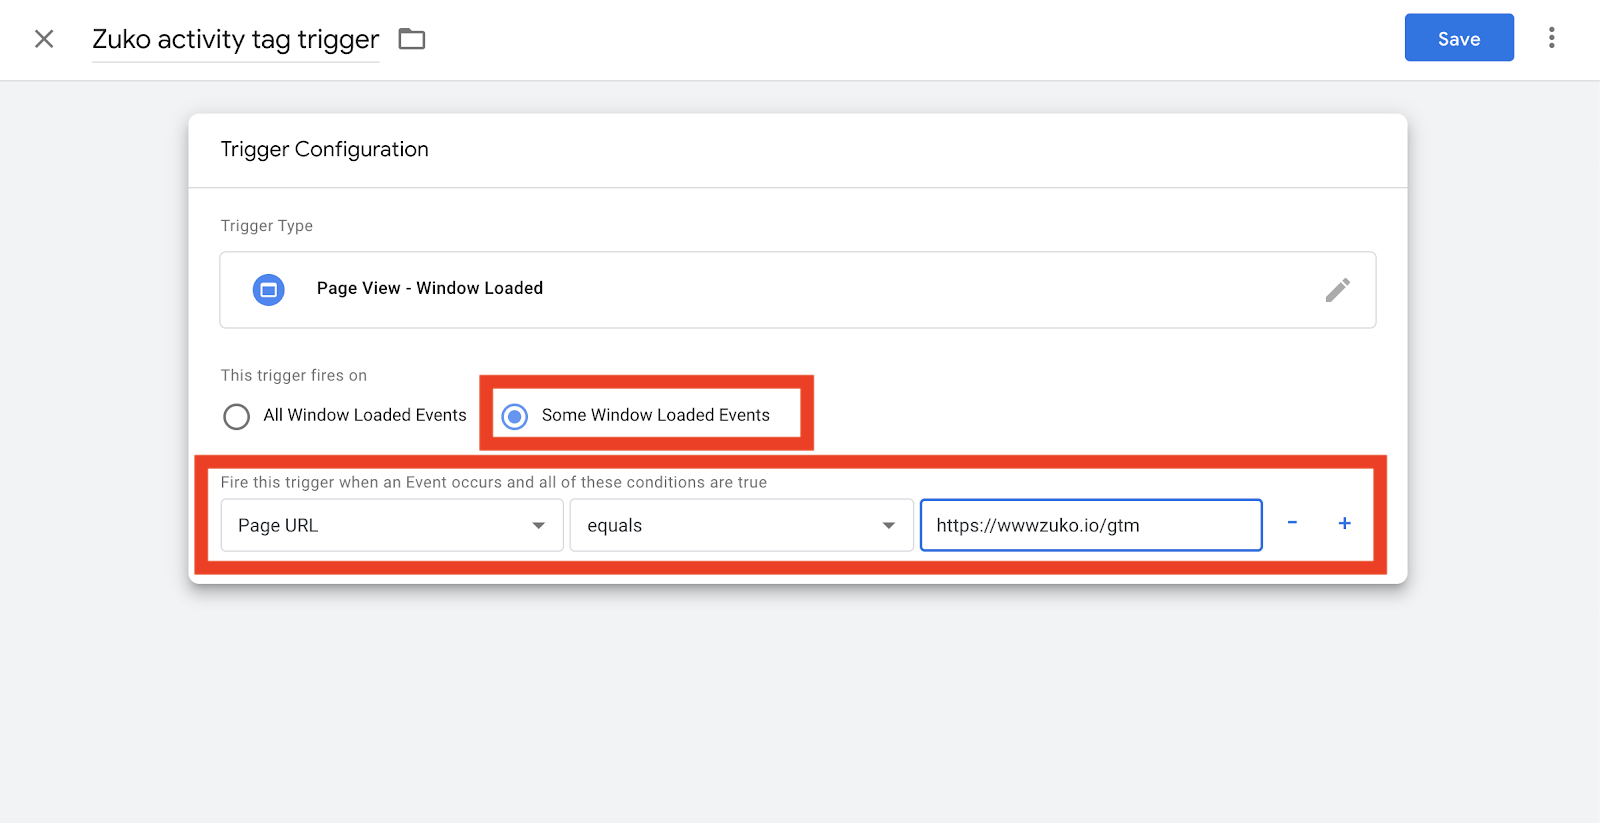
Next you will need to set where you want the code to fire. You do that in the “triggering” box.
When choosing the trigger type, there are a few choices.

Which one you choose will depend on how your checkout works. However, we find that Window Loaded is generally the best option. This means that Zuko code is not triggered until the window is fully loaded and so interaction events do not get missed.
Once you’ve selected the trigger type, you’ll need to select the “Some Window Loaded Events” and define the conditions.
For some checkouts, you can just paste a static URL:
However, some users like to isolate a particular part of the buyer journey so you may want to introduce a referral path condition as well. If your checkout is adding unique customer IDs to the URL (e.g. https://example.com/checkout/step1/customerID-XXXXXXXX) you may need to use another matching rule.

You can get a more detailed rundown of GTM trigger events here.
Step 5 - Add the Completion Tracking Tag
The completion tracking code should fire when you deem that a customer has successfully completed checkout (usually the confirmation page but it can be earlier if you are isolating a particular customer pathway).
As you did for the Activity Tracking tab, add the paste the completion tag code into the custom HTML tag type:
You should then set the completion trigger to fire on your confirmation page. You will most likely need to use one of GTM’s matching rules (as outlined above) if the confirmation page is a dynamic one.
Note: for the completion tag, you can use pageview rather than window loaded as the completion code can fire as soon as the page is viewable. Zuko does not need to wait for any further form content to be loaded.
Step 6 - Check your Set Up
You can use GTM’s preview mode to check your installation - take a dummy run through the Magento checkout to confirm everything is firing. You can also use the Network tab in your browser to check this out - our guide to checking your code installation shows you how to do that.
You should then be ready to harvest the insights that will allow you to improve your checkout configuration, reduce basket abandonment and increase conversion rate.
If you have any problems getting Zuko installed on your Magento eCommerce site please get in touch: support@zuko.io
Want to get started with Zuko?
Start a free trial that includes all features, or request a demo